Saturday, December 31, 2011

Bedspread Update


I have made quite a bit of progress in the last few days on my crazy quilt bedspread so I thought I would give you a quick shot of what it is looking like. Remember I am piecing it to a micro fleece blanket so the white areas extending from the bedspread still have to have strips attached.


I have three more rounds to do before I am finished! The strips are getting longer to do and I have had to pin so much that my fingers hurt! It will all be worth it when it is done.

Talk to you later,


Thursday, December 29, 2011

Project Updates

I wanted to do this post yesterday but our internet was not working!  I think with everyone home this week, they  are all on the internet.  I wanted to update you on the MCC blocks we are working on and also show you what I have been doing on my crazy quilt bedspread.  Pictured above is what I have added to the December block that we are giving to MCC.

This is the September square after Dixie worked on it.  Yesterday we traded squares and hope to finish them in the next couple of weeks.


I finished the center section of my crazy quilt bedspread and above is a shot of the 18 squares.  Pictured below is what they look like on my bed.


I am going to piece this crazy quilt to a micro fleece blanket like Allie Aller did with her crazy quilt bedspread.  I had a hard time finding one that is big enough to make into a bedspread that will hang over the edges as long as I wanted them.  I finally found one at TJ Maxx to my surprise.  I don't usually shop there but just happened to think of it and was very glad I did!

I decided to start at the center top and work my way down with this quilt.  Because I was sewing the squares directly to the micro fleece I felt I should pin a lot.  I am so glad I did!  I sewed around three of the sides and left the top open for ease.
 It is a little tricky to put a 90 by 107 micro fleece blanket through my machine but where there's a will there's a way!

I then pinned the next square on the right and sewed them together.  I didn't take a picture but then I sewed the square on the left on.  I then pressed them out well.


Since I wasn't able to piece the next row the same way, I sewed three of them together and then pinned them to the bottom of the previous row.  I repeated that until I had attached all six rows of squares to the micro fleece.


As you can see, I had a helper the whole time!  If the internet is working tomorrow, I'll show you my progress.   I am really pleased with what I have so far. 

Talk to you later,


Tuesday, December 20, 2011

My Crazy Quilt Bedspread

In September I bought all of this fabric to make a new bedspread for our bed. I had been stewing all summer about what kind of bedspread I wanted to make. I finally decided that because I am a crazy quilt teacher, it seemed appropriate that I have a crazy quilt bedspread! The fabric sat in this sack until after the Victorian Stitchery Retreat was over in November. I was just too busy to even look at it, but I was still mulling over how I was going to make this crazy quilt bedspread. There were many variables to think about such as the design and how I was going to hold all the layers together when I was done.

When Allie Aller was here, she reminded me that she had blogged about a bedspread that she made for her bed. If you want to read up on that, here is a link to her bedspread http://alliesinstitches.blogspot.com/search/label/projects%3A%20Bars%20and%20Stripes. She has made several bedspread's over the years but I was totally inspired by the all silk one that she made for her sister-in-law. I just love it! With kids and pets it isn't practical for me to make an all silk bedspread but I decided to use the square design of that quilt.

About two weeks ago, I washed the fabrics so I could begin piecing and then here they sat.

The muslin I was going to use for the piecing of the squares did not wash well at all! I decided that life was too short to deal with all of the wrinkles that appeared when it was washed and it probably wasn't a good candidate for the foundation of my bedspread. I remembered that I had some white sheets that we weren't using anymore and they had been washed many times, so that is what I am using. The thickness of the sheet won't matter because I am not embellishing this quilt at all for the same reason that it won't be made out of silk!

Last night I finished the center section of squares and placed them on my bed. I was not happy at all! The one solid piece of fabric I choose to use just stuck out like a sore thumb and I just couldn't live with it! Sorry for the weird lighting in this picture.

I took the blocks apart today and did them all over and I am much happier! It was worth all of the effort.

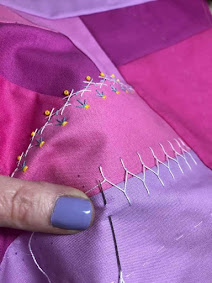
Here is a close up of one of the blocks before.......

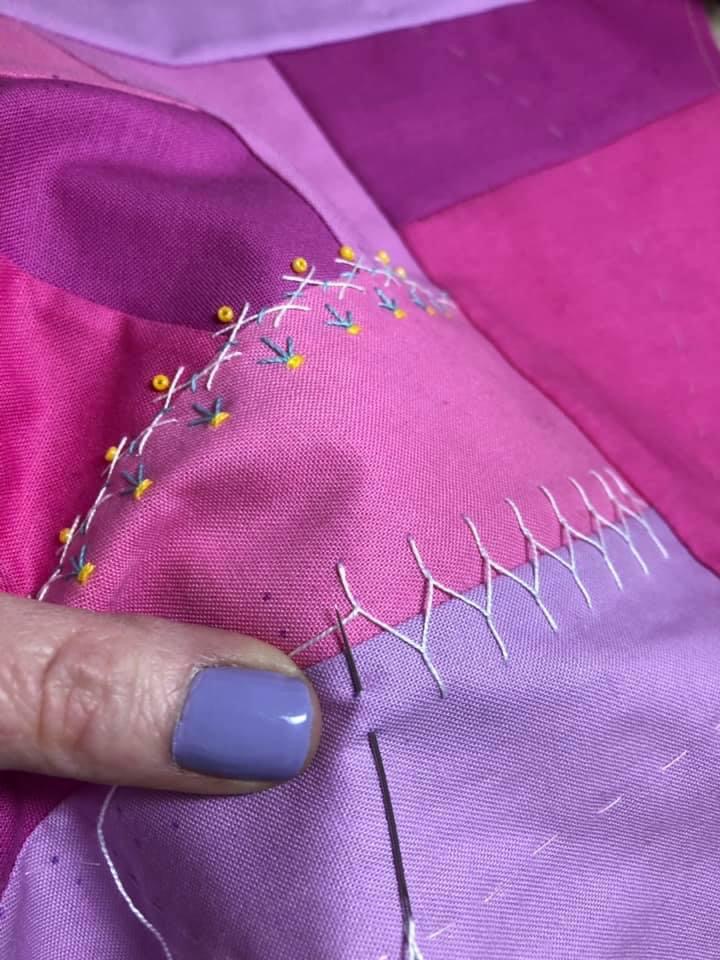
and one after. The difference to me is just huge! This quilt violates all rules about not piecing pattern against pattern, so it has been a very different experience for me. I also don't use cottons ever when I crazy quilt, so that has also been different but refreshing. I'll keep you posted with progress in the next few days!

Thursday, December 15, 2011

Christmas Tree Tutorial


This is a Christmas tree tutorial but it is also a MCC update. I am working on the final block for the MCC sale which is a block for the month of December. I originally was going to embroider my tree on the gold fabric but liked the contrast of the green on the burgundy fabric better.


First you need to make an outline of your Christmas tree with a marking pen of your choice. Mine is kind of faint but I wanted it to rub off easily when I was done.

Then you will embroider the point of your Christmas tree with a feather stitch like pictured above. I then go along and mark some of the places that I want to put my branches just as a general outline.

Then start doing your feather stitch to the center of your Christmas tree. I usually go down all on one side and start at the top on the other side.


Here is what your tree will look like after the first round.

Now you will want to go back and fill the blank areas. You may even vary the lengths of your branches to make the tree look more realistic.

I then go in and decorate my tree, that is always the fun part! I hope you will enjoy making a Christmas tree on your favorite holiday project.


Monday, December 12, 2011

My Favorite Things


As a crazy quilter, I love to crazy quilt everything in sight! One of my favorite things to do is make 3-D objects such as stuffed animals. I did this pastel bear many years ago but I just love it and it sits by my front door throughout the year. Several years later, I made a Christmas bear.


During the year he sits on the top shelf in my shop, but at Christmas he gets the place of honor by the door! I have made other animals crazy quilted in years past, but it seems the bears always win out. Who doesn't love a bear?

Talk to you later,


Friday, December 9, 2011

MCC Crazy Quilt Update


It has been awhile since I have done a MCC Crazy Quilt update. For those of you new to my blog, you may be asking,"What is MCC?" Every year myself and 6 other talented women make a crazy quilt that we donate to the MCC sale. MCC stands for the Mennonite Central Committee and they function much like the Red Cross. They respond to natural disasters and help people to get back on their feet again. I can't even remember how many years I have been donating crazy quilt items to the sale. We do the block in a round robin style, where usually I piece the block and mail it to the next person on our list and they work on 4 seams or open spaces and then they mail it on. We do this throughout the year and usually I pass out blocks for the next year when we are together at the auction. This year we decided to not make a whole crazy quilt but to do 12 individual wall hanging's with each representing something special about each month. The picture above is March where we did a St. Patrick's day theme. It is pretty close to done!


Here is the block representing April with an Easter theme and it is pretty close to done also!


I just pieced this block today for November and you probably guessed it is a Thanksgiving theme.


This block is for October, featuring a pumpkin theme.

Here is our September block with an apple theme. I am a little bit worried about our finishing up in time with a March deadline looming ahead of us, but we usually pull it off just fine!

I have scheduled the date for the 2012 Victorian Stitchery Retreat so if you would like to come next year, the dates are November 7-10. I'll keep you posted as I have more info!

Talk to you later,


Friday, December 2, 2011

One of the Reasons for the Season


I just finished embroidering this on my Valentine Crazy Quilt, but it is a reason for the season! Have a Happy Pink Saturday and be sure to visit our sponsor by clicking on the Pink Saturday button on the right side bar.

Happy Holidays,